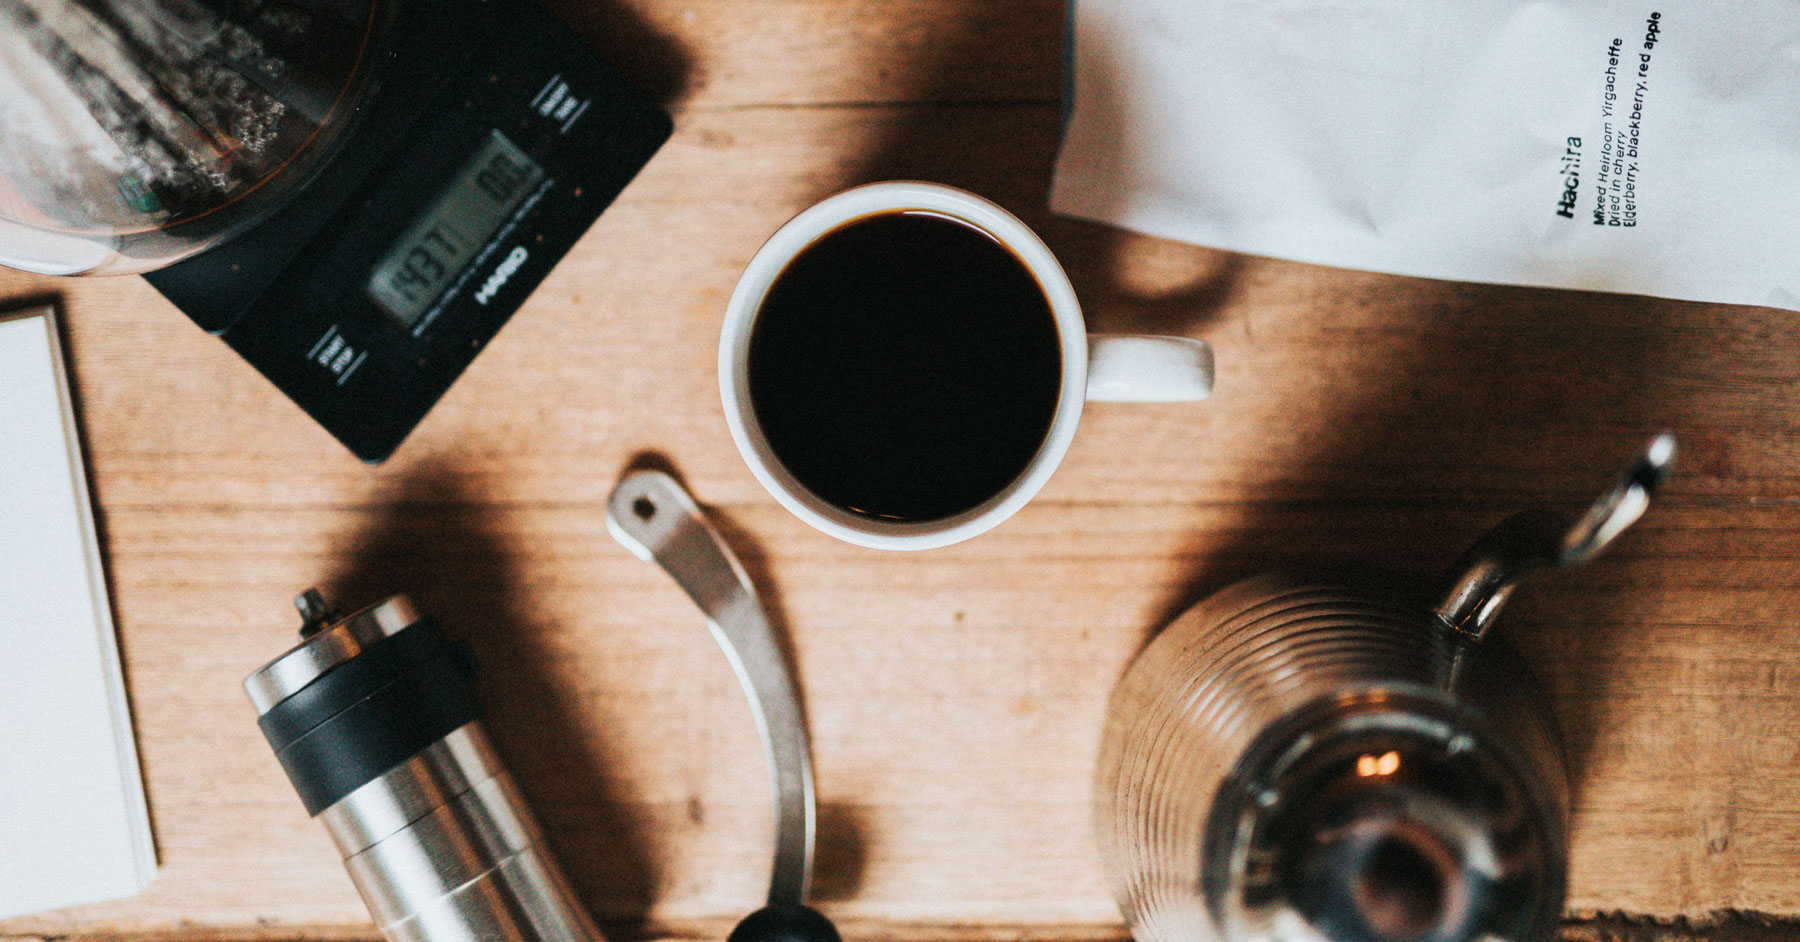
After years of experimentation, I think I’ve finally perfected making coffee on the road.
If you’re wondering why I would possibly make my own coffee on the road when every hotel room in America comes with some kind of in-room coffee maker and every hotel lobby everywhere has coffee, there are two main reasons:
- It is an important part of my morning routine
- I am spoiled
I live in a good coffee mecca — there are eight good-to-outstanding third wave shops within a fifteen minute walk of my house.1In my own highly idiosyncratic preference order: Intelligentsia, Passion House, Buzz, Gaslight, Halfwit, Damn Fine, Jimmy Beans, Colectivo. There is a ninth opening in the spring.2Sip of Hope Four of these shops roast their beans on site. Three more roast within four miles of here.
Four restaurants in the neighborhood also have walk-up coffee bars that, despite being basically an afterthought, serve better coffee than every Starbucks ever.3Cellar Door, Reno, Lula, Same Day Cafe
In addition to all that, my first job was as a barista, and I still find the process of making coffee meditative and “the perfect cup” a tantalizing and far-off goal. Even though I mostly use the same dripper every morning4Might as well wade right into this controversy: I prefer the Bee House, a sort of “upgraded” Melitta style dripper, to a v60 for everyday use.
Why? Consistency.
I can make marginally better cups with a v60 when I have all of the variables correct, but for every perfect cup, I make one or two okay-to-bad ones because the grind size is slightly off, I poured too quickly, I poured too slowly, I poured too close to the edge, I poured facing west instead of north, I poured facing north instead of west, you get the idea.
The v60 is finicky and difficult to get right. This is part of its charm — it’s an expert-level tool. But it’s normally 5:15 in the morning when I’m doing this. I’d rather make very good coffee almost always from the Bee House than make perfect coffee occasionally with a v60.
Really, this is my approach to most things., my kitchen is stuffed with so many different coffee tools it looks like a chemistry lab.
Being surrounded by this much good coffee for so long makes it hard to tolerate bad coffee. To be clear, I’ll drink pretty much any coffee in a pinch, including the stuff from a hotel coffee maker — I’m more of a coffee nerd than a coffee snob — but I will go to the extra effort to get the good stuff, even if it involves paying more or bringing my own equipment.
Making coffee also serves an easy shortcut into the headspace I need to do good creative work, because like many creative endeavors, coffee-making is a craft. It’s highly tinkerable. It practically begs obsessive care and research. But unlike many crafts, the act of brewing requires no real cognitive processing power, only attention, which makes it a perfect way to get the neurons firing before they’re really needed.
All of those things, plus a mild chemical dependency, have made coffee-making a part of my morning routine off-and-on for years. Taking it on the road so it could be a part of my morning routine no matter where I was seemed like the obvious next step.
Quick aside: why write this in the first place?
Because it serves as a practicum for my philosophy about basically everything.
You’ve probably heard the cliche “the devil is in the detail.” As it happens, that’s not the original line. The original, normally credited to Mies van Der Rohe, is the opposite: “God is in the detail.”
There are things you do and interact with every day without a second thought that are deeply, endlessly fascinating. They’re only mediocre and boring and rote because you let them be. Digging into any one (or many) of these things turns chores into hobbies and fills the world with a glittering, secret life.
You could fill entire books on the history, manufacture, and perfection of basically every common household object and foodstuff, from the keyboard on your desk to the beer in your fridge.5If you want examples, check out the podcasts 99% Invisible, Containers, and Every Little Thing and the TV show Going Deep with David Rees, four documentary endeavors whose entire mission statement is filling half hour after half hour with fascinating content about stuff that seems like it doesn’t deserve a second thought.
Make uninteresting things interesting by caring more about them. You might not drink coffee, and that’s fine. Pick something else that you do or interact with every day and get deeply nerdy about it. Do the research. Optimize. Micro-optimize.
You’ll find that the deeper you go, the more you care about it, even if you didn’t before. It will bring you a better experience every time you interact with that thing, and make you more interesting to talk to. Your life will be more enjoyable for it.
Success criteria
Back to coffee.
Let’s start by enumerating some of the qualities of a perfect travel coffee rig. If you’re looking to put together your own travel coffee kit, it’s a good place to start, but these may not be your final criteria. That’s fine. Modify as needed.
It is packable. As small as possible without sacrificing function or quality — I’m generally less worried about weight than I am size. Components that fit into other components preferred.
It is durable. Repeated air travel is not nice to anything, especially things designed to sit on kitchen counters or in coffee shops. Definitely no glass.
It can be used in a hotel and an office. This is mostly a call for a rig as simple, low-footprint, un-complicated and not-insane-looking as possible. I actually like the questions and conversations that stem from being “that guy” making coffee in a client office — it’s a nice way to meet people you wouldn’t otherwise interact with, which can have positive work implications — but there’s a difference between being eccentric and being a pain in the ass.
It is as materially similar as possible to how I make coffee at home. Both for supplies reasons and routine reasons — if the whole point of this is to start my morning the same way every day, it should be roughly the same process wherever I am. I’d also prefer not to have to buy different filters or other consumables just for my travel rig, although this is negotiable.
It has to make good coffee. Naturally the most important one. Compared to what I can normally get in a hotel, it’s not a high bar, but it does mean a few things: fresh grinding recently-roasted beans, which means I have to bring the beans and a grinder myself, and being able to produce consistent values for the main coffee variables.
Actually, this is worth its own section.
How To Make Good Coffee
Making coffee is the process of using water to selectively extract volatile compounds from roasted coffee beans.
That word selectively is important here; there are a lot of compounds in coffee beans that we want in our finished cup, and just as many we don’t.
Therefore, making good coffee is the process of extracting as many of the desirable compounds (the caffeine, chlorogenic acid, volatile oils, and other stuff that tastes good and/or makes us smarter) from the coffee beans as possible while leaving behind as many of the undesirable compounds (the stuff that tastes bitter, sour, burnt, etc) as possible.
Generally speaking, we have seven main variables to play with in the quest for the perfect extraction:
The beans themselves. You can’t extract something that isn’t there. Different bean varieties, growing locations, processing methods, and roasts can produce different flavors in the finished cup because they produce different concentrations of the volatile compounds we’re looking to extract.6The sommelier-style “Lemon, anise, stone fruit, chocolate bar“ tasting notes you’ll see on a fancy coffee place’s menu can get quite silly, but even a relatively unrefined palette (like mine!) can can notice things like acidity, sweetness, bitterness, body, and if something tastes burnt. How recently they were roasted matters a lot too.7Experts say the best window is between three and fourteen days from the roast date. Before that and it’s not done “maturing,” after that it’s stale (but still totally drinkable; just not optimal). If you’re buying coffee that does not have a roast date on it at all, you have probably never bought freshly roasted coffee, and more tragically, never smelled it.
The grind of the beans. This is mostly about surface area — more surface area means more water comes in contact with more bean, and pulls more out of it. The right size grind depends on the brewing method and the bean. Burr grinders are preferred to blade grinders because they produce pieces that are all the same size. Different sized bean pieces (like what’s produced with a blade grinder) mean some pieces end up under-extracted and others over-extracted.
Fresh-grinding is also very, very important. A whole bean is a pretty stable package, but the volatile compounds that are the difference between an okay and a great cup of coffee dissipate quickly after the bean is cracked open.
The water. Coffee is 99% water, after all. You don’t need to use expensive mineral water to make coffee, but if the water tastes weird when it’s water, it’ll taste weird when it’s coffee, too.
The volume of water. This mostly impacts the final “concentration” of the coffee, which is to say, its strength and body. It also impacts extraction itself, basically as a function of solubility — to a degree, more water means the ability to leech more out of the beans, especially in drip coffee, where you’re constantly refilling the brewer with fresh water. This is desirable to a point, until it’s not.
The brewing temperature. Between 195 and 205 degrees Fahrenheit is generally considered ideal to get the most of what we want and the least of what we don’t.
For reference, this is not boiling, which happens at 212°. Moka pots and percolators brew at boiling, which is why both of these methods consistently taste bitter and burnt.
The brewing duration. The longer the grounds are in contact with the water, the more stuff gets extracted. The right time is variable, and depends on the brewing method, grind size, and bean.
The brewing method. Brewing methods are the many ways to put it all together, each with their own tools and processes — espresso adds pressure to a very fine grind to produce a very fast extraction. French press leaves a much larger grind in contact with the water for several minutes. Aeropress is best described as a weird combination of espresso and french press, and pour-over or “drip” coffee is somewhere between the two.
With drip coffee, the water is only in contact with the coffee for as long as it takes for it to flow through the dripper (which can be controlled by grind size and dripper mechanism), which requires a smaller grind, but you pour all the water through serially, so you end up with a similar outcome as the french press.8Think about it as the difference between carrying all of the groceries in at once and making ten trips to the car — it all eventually gets into the house either way.
The Quest For Perfection
Version one: Pete Hodgson’s Ultimate Traveler’s Coffee Kit
Contents: Aerobie Aeropress with Travel Cap and reusable metal filters, Hario Mini Mill, small Camp Mug, in a Klein Tools bag.
Pete’s an old coworker, and the person who started me down this sordid path after a fateful conversation about my inability to get good coffee on the road. You can (and should) read his blog post linked above, where he goes over the details of why and how he uses this setup.
I happened to already own everything in his kit except a few of the aftermarket Aeropress parts, so it was easy to make happen. The metal filter means you never run out of filters, and produces a better brew anyway.9That said, if you’re in a strange hotel room or office without a metal filter or a circular paper filter for your Aeropress, find any regular coffee filter, double it up, wet it, and screw the Aeropress’s filter cap on top of it. Now you have a filter.
The Klein Tools bag is just a sturdy, made-in-USA canvas bag that’s good for carrying things when you travel. My friend Nick Disabato turned me on to them — he’s actually got a whole packing system based around these bags that I use and love. But that’s a topic for a different time.
Version two: adding, then getting rid of unnecessary components
Contents: same as above, plus a thermometer and a scale.
I’m a sucker for perfection. After the first two times I brought this on the road, I brought a couple of components Pete doesn’t mention: a thermometer and a scale. At a total of a twenty-dollar investment and minimal extra space, they seemed worth it if they led to a dramatically better cup.
With these additions, I found my perfect Aeropress recipe: 25g of coffee ground at eight clicks on the Hario into 175g of 195 degree water, inverted method, with a two-minute steep. Then press into a mug, and dilute with another hundred or so grams of water. For filters, double up on the the mesh and the extra fine filters from this three-pack.
It produces something that’s much closer to a drip coffee in body and flavor than most Aeropress recipes I see around.
Once I nailed this down, the scale and thermometer became helpful, but not necessary, and if you’re trying to create a rig with as few moving parts as possible, “not necessary” means “not bringing it.”
The thermometer turned out to be unnecessary because boiling water cools at a very predictable rate. Assuming you’re coming from a rolling boil, the results are predictable enough that you can just use a watch to figure it out: a liter of water (at sea level in a normal-ish electric kettle) takes four-ish minutes to reach 190. 8–12oz in a paper or styrofoam cup takes a little over two.
That said, you can’t get hot water from the coffee maker in the room if you plan to skip the thermometer, because it comes out at wildly inconsistent temperatures. I wouldn’t recommend this anyway — it often gives the water a weird stale-coffee flavor. Many hotels will give you a kettle upon request, and for the ones that don’t, water can be boiled in a microwave (or in a saucepan in a place like a Residence).
The scale was unnecessary too. Because I was using the same beans and the same method every time, a quick mark with a sharpie on the Aeropress and one on the grinder’s catch tube let me repeat an exact-enough measurement after the first few weighs.
Version three: goodbye Hario, hello Porlex
Contents: same as the first one, replacing the Hario for a Porlex
After while, the plastic threads on my Hario began cracking off from the top. I also began noticing a less-even grind size, caused by the same floating-inner-burr problem their full-size Skerton has, and exacerbated by the missing plastic on the top of the canister.
I switched to a stainless steel Porlex grinder (with tape mod for stability) instead. More reliable, more durable, more consistent. With a completely stainless steel construction — except the grinder, which is ceramic — the thing could be used as a small weapon if you were suddenly in a bad way.
They make a mini version of the porlex, but it’s only about an inch and a half shorter, and can only grind about 20g of beans at a time — just shy of my standard 25-gram dose, which means a more complicated grinding and measuring process, so I went with the full-size JP-30. Depending on how you make your coffee, you may prefer the smaller size.
Plus, a Porlex fits almost exactly into the barrel of an Aeropress, which was a nice win for packability. But, it meant the beans needed to move. I started putting the porlex in the Aeropress and keeping the beans in a reused zip-top mylar bag. The floppiness of this storage solution let it mold around the other things in the bigger bag, ultimately adding less space than a hard-walled container.
Version four: disposable drippers
Contents: Kalita Kantan drippers, Porlex, AWS-600 scale, small Camp Mug, in a Klein Tools bag.
If you like Aeropress coffee, Pete’s original setup is still basically perfect. With a Porlex, it is perfect.
But, I still never liked the Aeropress that much. It makes something between espresso and drip coffee, which is good, but not my favorite. Even when you brew it to be a bit lighter and thinner, it still has a heavy body and muted, muddy flavors.
I wanted drip coffee on the road. I like its clear, bright taste better, and it’s the way I make coffee at home.
So, my search continued. I tried a few “portable dripper” options I could find, including one that looked like a silicone ziggurat and one that looked like a slinky.
They all sucked for various reasons. Mostly, they were too flimsy and collapsed or fell over under their own weight, but only after you started pouring very hot water in them.10Apologies to the Westin in Wilmington DE, whose carpets and hand towels were soiled on three different occasions so I could learn this fact.
Then, Nick (the same one above, who turned me on to Klein Tools bags), turned me onto Kantan drippers. He also happens to also be a coffee obsessive and frequent traveler, as it turns out.
They’re an exceptionally well-made product — a flatpack cardboard and filter paper construction that becomes a dripper (with filter) that can sit on any reasonably-sized mug with just a gentle fold.
With these drippers, the scale returned to the kit, so I could make sure I was pouring the correct amount of water at the correct rate. I tried markings on the inside of the mug, but with the Kantan over top, it was nearly impossible to see what was going on in there.
If you don’t already own a scale, you could also just use a clear vessel (maybe something like this) and mark the target water level(s) on the outside to accomplish this, but I already owned the scale, it’s tiny, and I had grown slightly attached to my mug.
Still, I wasn’t completely happy with the disposable drippers.
For one thing, they have a very small capacity — the manufacturer recommends using 8-10g of ground coffee, which translates to about 150mL or 5 oz of coffee. You can push this to about 13 grams (200ish mL of coffee), but even there, I ended up making two most mornings.
Basically, they work exceptionally well for someone like Nick, who only travels a handful of weeks a year, but going through two of these every morning begins to feel excessively wasteful after a few weeks or months on the road. Plus, the cardboard still requires a bit of care so it doesn’t collapse onto itself.
I wanted a non-disposable portable dripper. Something truly reusable, sturdy like the ones I use at home, big enough to make at least 12 oz of coffee at once, and smaller and lighter than either. But, this was also the time that I started traveling a lot less. The search paused for a while.
Version five: a collapsible dripper I actually like
A few weeks ago, as I was already contemplating writing this article, I googled around to see if the portable dripper landscape had changed much. I finally found it.
The Snow Peak folding dripper, courtesy of this exceptionally strange video.
Almost exactly a day later, Nick came back from a trip to Japan talking about this Tetra dripper (also comes in stainless) that he found over there.
They both fit all of my criteria — sturdy, portable, identical in process to what I do at home. Which also means they use filters I nearly always have on hand in the house, saving me from a surprise run out to a store on a pre-flight Sunday afternoon.
I bought ‘em both immediately.
Which brings us to today. Even though I’m not traveling very much, I’ve been playing with these at home. I think one of them is likely to become the new reigning champion.
The jury’s still out on which one I prefer, but I’m leaning towards the Snow Peak for the slightly larger volume and the ability to use flat bottom melitta-style filters, which are a little more forgiving to my ham-handed hotel brewing techniques. It’s quite a bit heavier and larger than the Tetra (140g vs 14g), so if you’re an ultra-minimalist packer or a stickler about pack weight, that’s something to consider.
Gear list
If you’re this far down the article, it’s probably time to make your own travel coffee kit.
Here’s a full rundown of all of the gear I mentioned above, with some notes about each thing. Mix and match from it as desired — your perfect setup may not be identical to mine, and that’s A-OK. Experiment. Whatever works for you is what you should use.
Klein Tools bags
Really any sturdy bag will work. Pete Hodgson uses an Eagle Creek Pack-it bag, which fits his kit exactly. Comparatively, the Klein bags are roomier than necessary, but since I use them for other parts of my standard travel kit, it’s easier for me to just use the same thing for everything. Because they are flat when empty, the extra size doesn’t really translate to extra packing bulk anyway.
Camp Mug
This is just one I had in my house, really. I’ve had my eye on this mug as an upgrade, but haven’t pulled the trigger yet. I’ll update this post when I do. If you’re not hurting for space and want something insulated, I’m a huge fan of Zojirushi’s vacuum flasks but the “stuff goes in the mug” trick doesn’t really work with their narrow opening.
Aerobie Aeropress
A real gem of a brewing system. Fun fact: The Aeropress is the only thing Aerobie makes that isn’t meant to be thrown around in a park.
Aeropress Travel Cap
Turns the plunger into a storage container, also makes pushing down on it a little more comfortable.
ThermoPro instant-read thermometer
Basically a knock-off Thermapen. If thermapens are the Tesla of instant read thermometers, this thing is the Nissan Leaf. The plastic parts can’t be submerged, it’s a little less durable, it takes two or three seconds longer for it to get an accurate reading, but it’s also roughly ⅕ of the price. I don’t see the need to upgrade.
AWS-600 Scale
A great, precise, durable, cheap scale. It only has a 600g capacity, so it’s not great for general kitchen use, but it’s suitable for basically everything a traveling coffee fanatic can throw at it. Warning: this is apparently also a preferred scale for marijuana enthusiasts, so don’t be surprised when you start seeing suggestions for rolling papers and grinders in your Amazon suggestions.
Aeropress reusable metal filters
I got the three-pack because I’m a tinkerer. This isn’t the canonical brand for either the mesh filter (that would be the Kaffeologie S-filter) or the solid filter (Able DISC), but I sincerely doubt it matters, because they’re not patented designs.
Hario Mini Mill
A really great portable hand-grinder, and about half the price of a Porlex, but not nearly as durable.
Porlex JP-30 and Porlex Mini grinder
Almost twice the price of the Hario, but hasn’t broken in years of not-very-gentle service, whereas the Hario started showing issues after less than a year
Kantan drippers
Origami dripper magic, but small capacity.
Snow Peak folding dripper
My new favorite toy. Takes Melitta-style flat bottom filters or v60-style filters just fine.
Tetra dripper
My other new favorite toy. Basically a portable snap-together v60. Slightly smaller capacity than the snow peak, but still a killer option. It also comes in stainless steel if that’s your jam.
Happy coffee-ing.